
In our first piece on using Zoom, we largely focused on the essentials – creating an account, setting up a meeting and how to operate within a meeting.
Today, we’re going to work through some of the more advanced aspects of Zoom that are fundamental to our collaboration- and connection- based work with NZ principals.
This includes whiteboards, breakout rooms and remote control.
How to share your screen in Zoom
When you click the ‘Share’ button, you get several options for what to show the rest of the attendees. You can select ‘Screen 1’ or ‘Screen 2’ to show the team your entire screen – that is, every window or tab you move between will show up.
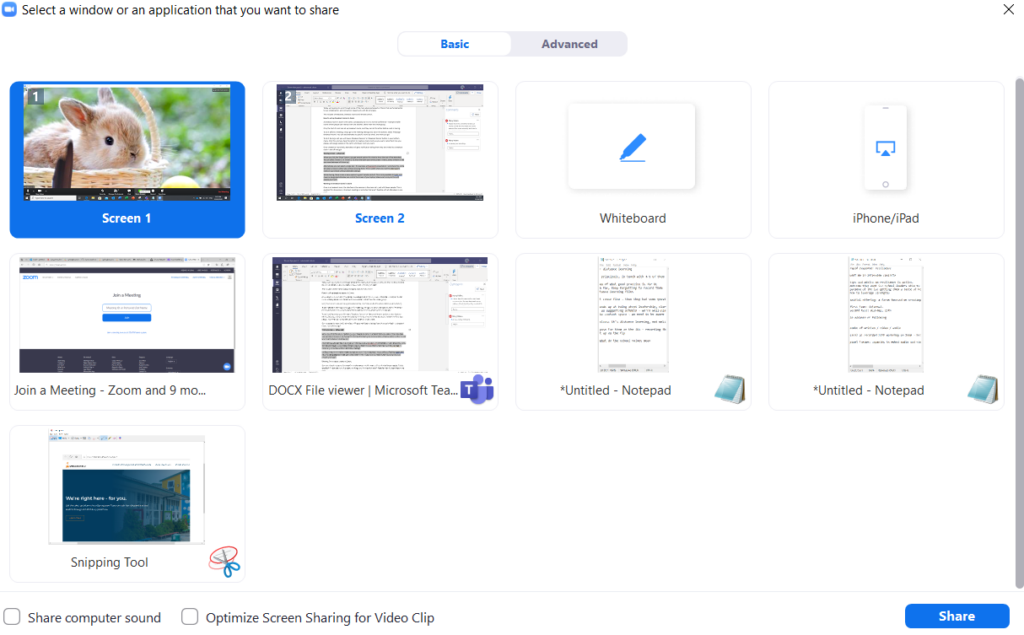
Alternatively, you can select a single tab – for example, a PowerPoint presentation – and share this, while still able to move to other tabs without showing them. This is useful when you want to refer back to notes or your emails without attendees seeing!
While sharing, there is also a menu option to grant ‘remote control’. This is only available to hosts, and means a designated attendee can control the screen of your laptop. Make sure to only do this with people you trust!
How to set up breakout rooms in Zoom
A breakout room in Zoom is the same, conceptually as it is in a normal conference – multiple smaller rooms where people can interact with one another, rather than the whole group.
Only the host of a call can set up breakout rooms, and they can do this either before a call or during it. To do it before a meeting, simply go to the meeting settings and, down the bottom, select ‘Preassign Breakout Rooms’. You can add attendees to specific rooms by email, and there you go!
To do it during a call, you will have a ‘Breakout Session’ or ‘Breakout Rooms’ button in your bottom menu. Click this, and you have the option to create as many rooms as you want, name them how you please, and assign people on the call to whichever room you want.
Once created (or launched), attendees will get a notification telling them they are invited to a breakout room – and off they go!
Working in breakout rooms in Zoom
Once in a breakout room, the interface is the same as in the main call – just with fewer people. This is excellent for discussions, intra-team meetings or activities that aren’t feasible with all attendees in one spot.
As a host, you can move between breakout rooms whenever you want – just go back to the Breakout Rooms menu, and click the room you want to visit.
People in a room can also ask you for help – you’ll get a pop-up notification which can take you direct to those people. Additionally, you can choose to close one or all of the rooms when it’s time to reconvene – everyone gets a 60-second prompt to leave the room, which takes them back to the main call.
Please note that if you, the host, are recording the meeting, it will record your own journey – including time you spend in breakout rooms. If you wish these sessions to be private, remember to turn off or pause the recording as you enter a breakout session. Attendees can also turn on their own recording when in a breakout room if they want to.
Whiteboards in Zoom: What are they and how to use them
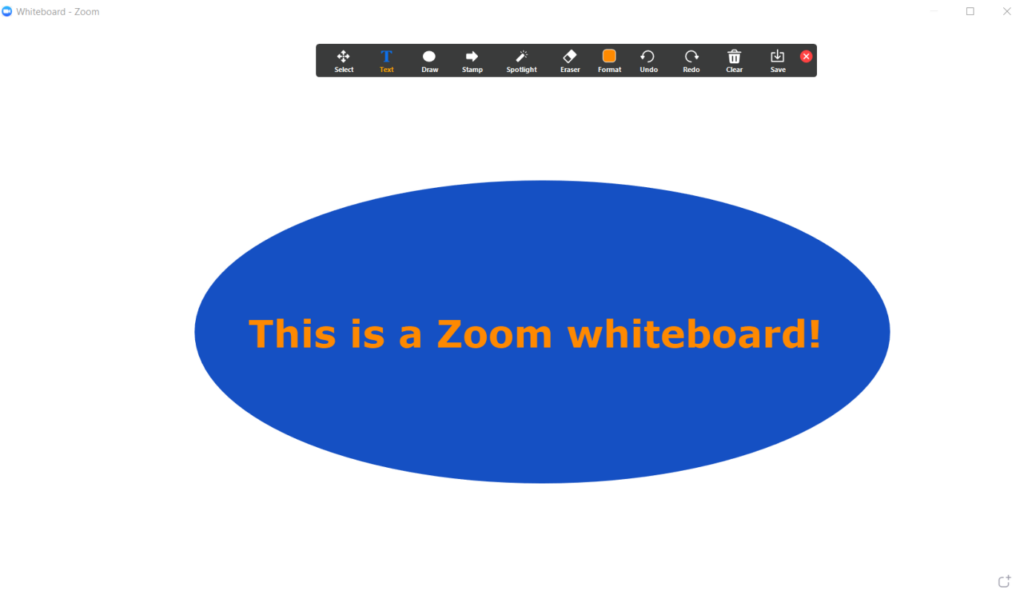
Whiteboard is a function under the ‘Share’ button, which creates a whiteboard that everyone can interact with – as far as the host permits.
Instead of selecting a screen to share, click ‘Whiteboard’ and it will come up for everyone. You can choose a number of options from the floating menu – text, drawing, icons and arrows, and more. Others can enable interacting with the whiteboard through a menu that shows up when you move your mouse to the top of the screen – click it, then click ‘annotate’.
By default, the host will be the only person who can use the whiteboard unless someone selects annotate – and even then, the host will have the ability to stop others from writing on it.
You can click the ‘Save’ button to save a freeze-frame of your whiteboard to your computer, which is useful if you’re doing multiple activities on the board and need to clear it without losing your work.
Zoom’s Security button: How it works
This is a new feature for meeting hosts, added by Zoom in response to security concerns – which we’ll go into in more detail for our next article.
The security button is in your in-call menu (the black bar at the bottom), and it lets you manage security settings for everyone on the call. Perhaps most importantly, it lets you ‘lock’ a call, preventing any more people from joining.
And there you have it! While we’ve labelled these advanced tips, the reality is that Zoom’s interface is quite intuitive and easy to pick up – as with all things, practice tends to make perfect.
But if you find yourself needing further assistance, please get in touch with the Springboard Trust team and we can set you up with the appropriate training in our network.